11 Ways To Restore Windows Photo Viewer Windows 10 PC – If you are looking for how to Restore Windows Photo Viewer on Windows 10, then you are in the right place.

How to Restore Windows Photo Viewer Windows 10 PC Laptop 2024
because, in this post, I will share with you, How to Restore Windows Photo Viewer on Windows 10, the Windows Photo Viewer application functions to open image files.
Read more:
- How to Install Windows 10 on MacBook and iMac
- How To Install Qualcomm Drivers on Windows
- How to Restore Deleted Files on Windows Defender
- How to Fix Blur and Small Text in Windows 10
In terms of usage, this application is easy to operate and lightweight so it doesn’t take up a lot of resources.
If you want to open a photo file from your laptop and can’t find an app called Windows Photo Viewer, then it’s most likely not active.
This problem is usually experienced after reinstalling Windows 10 on your laptop. If it’s like that, it takes a few steps to reactivate it.
Cause Windows Photo Viewer does not appear on Your PC Laptop
Things you should know, Windows Photo Viewer is a default application that is already installed by default on Windows 7 and 8.
But if you upgrade from Windows 7 or 8 to Windows 10, usually this application will still be there and still usable.
The common cause is that you are reinstalling Windows 10 and there may be an error during the installation process. So you need to know how to restore this application.
How to restore the Windows Photo Viewer application is very easy to understand. So don’t worry anymore because the method that will be given can definitely help.
But make sure you don’t find the Windows Photo Viewer application while opening a photo file. This indicates that the application is not active.
Here are some steps to restore the Windows Photo Viewer app in Windows 10:
#1. Download the Registry Key
The first step is to download the Registry Key from Windows Photo Viewer.
So this Registry Key can make it easier for you to update the system from the Windows Photo Viewer application.
Wait a few moments until the download is complete. If so, you click Show in the folder to make it easier to access files that have been downloaded.

#2. Extract the downloaded file
Next, you need to extract the ZIP file from the registry key.
The trick is you can right-click on the registry key file > then select the Extract to Windows 10 Photo Viewer Reg Key \ menu.

After extracting it, the folder from the registry key for the Windows Photo Viewer application will appear above it.
#3. Enter the file into the system
Then you can enter the registry key folder that was extracted and will see that there is a file in it.
Now you right-click the file> then select Merge.

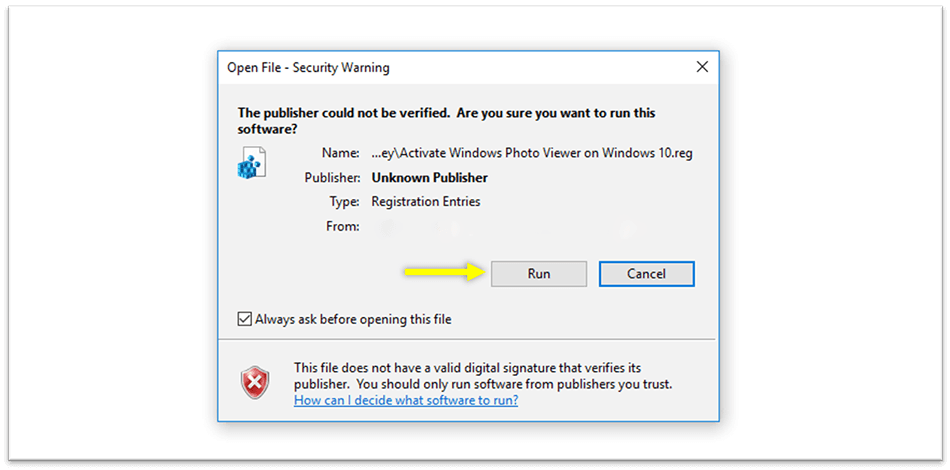
After clicking merge, usually, an Open File – Security Warning dialog box will appear to continue the merge process.
So you can click Run to continue.
#4. Enter the System Registry
After the file enters the system, now you have to enter the system registry.
The trick is to click Yes when the registry editor dialog box appears after you enter the file into the system.
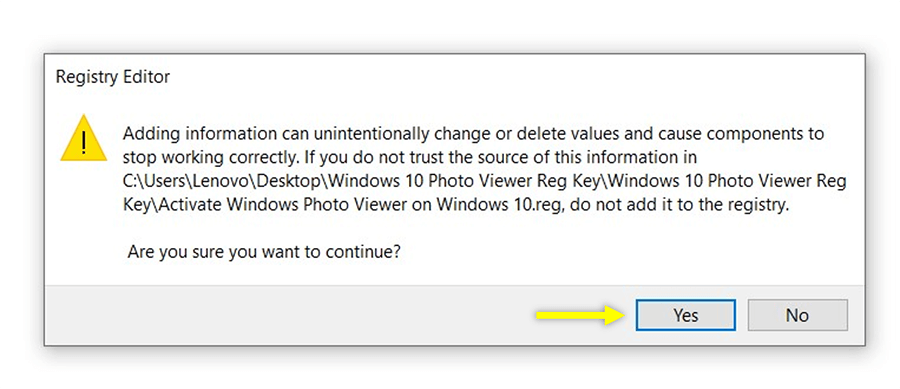
Then wait a few moments until the process is complete.
#5. Open Photos with Windows Photo Viewer
After you have followed all the steps above, now you can try to open any photos on the laptop.
But there is a way, here are some steps to open photos with Windows Photo Viewer:
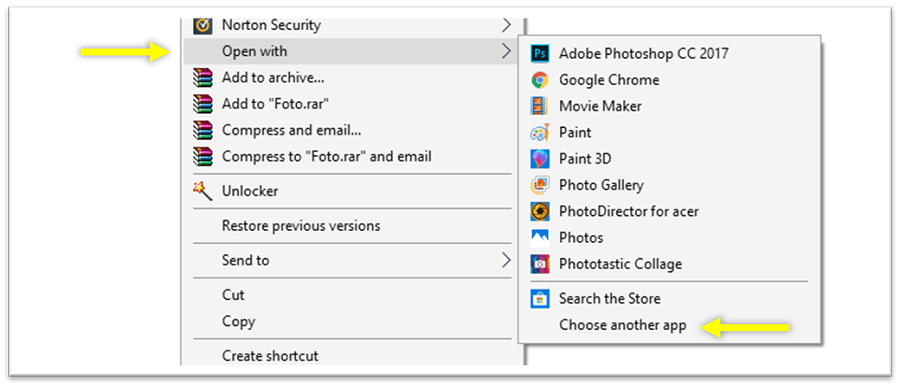
- Right-click on the photo that you have opened.
- Then select the Open With menu.
- After that select Choose another app.
- Then select More apps
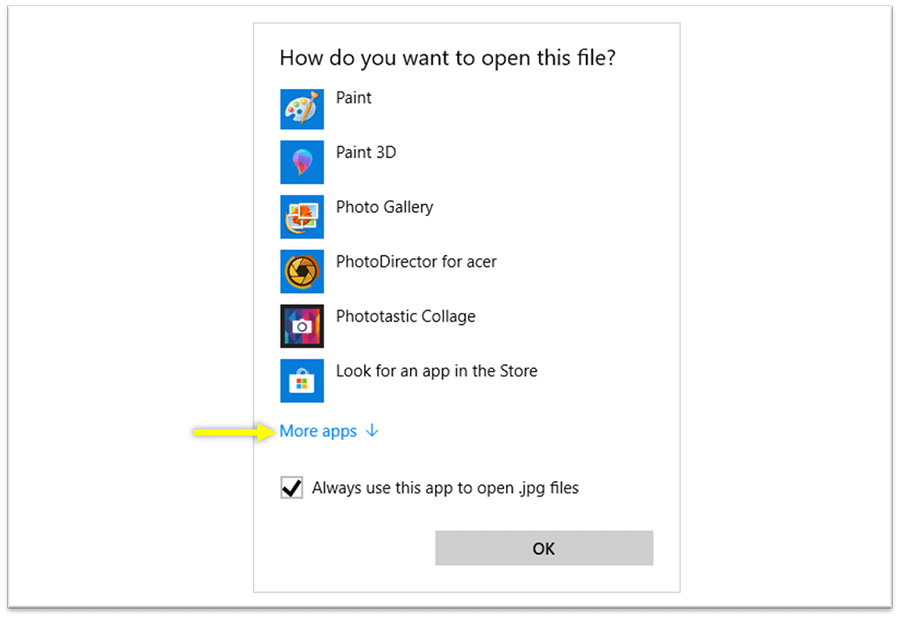
- Select Windows Photo Viewer and put a checkmark in the column Always use this app to open .jpg files then click OK.
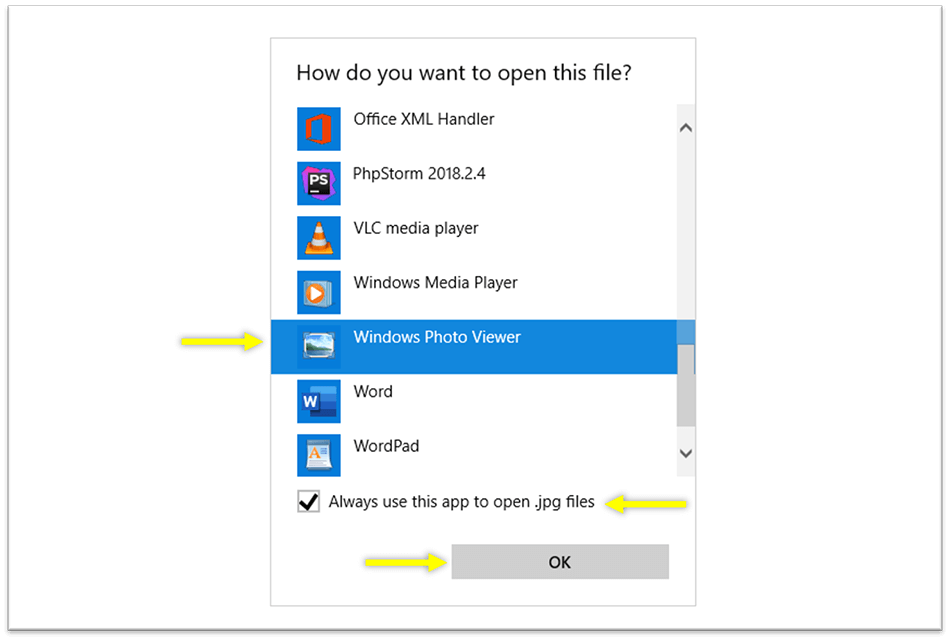
- So now the photo you want to open will use Windows Photo Viewer to display it.

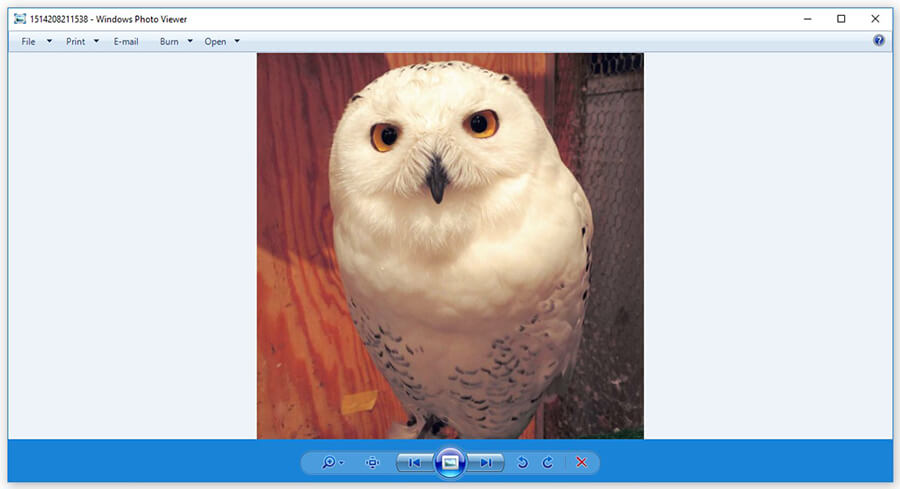
So now you can use the Windows Photo Viewer application again to open photos.
The Windows Photo Viewer option does not appear. What’s the solution?
In some cases, quite a lot of people experience this, maybe you are one of them. Even though you have followed all the steps correctly.
So to handle it, you can try restarting the laptop you are using. Usually, on some laptops, it takes time or a special way to update the application system.
Apart from restarting, you can also apply Windows Photo Viewer manually. More details can follow the steps below:
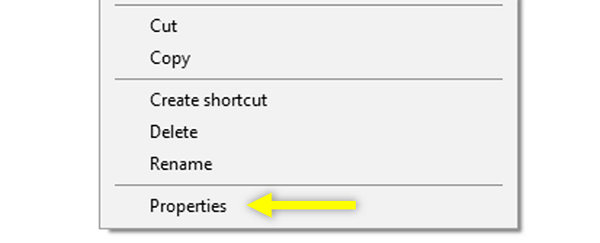
- Right-click the photo you want to open.
- Then select the Properties menu.
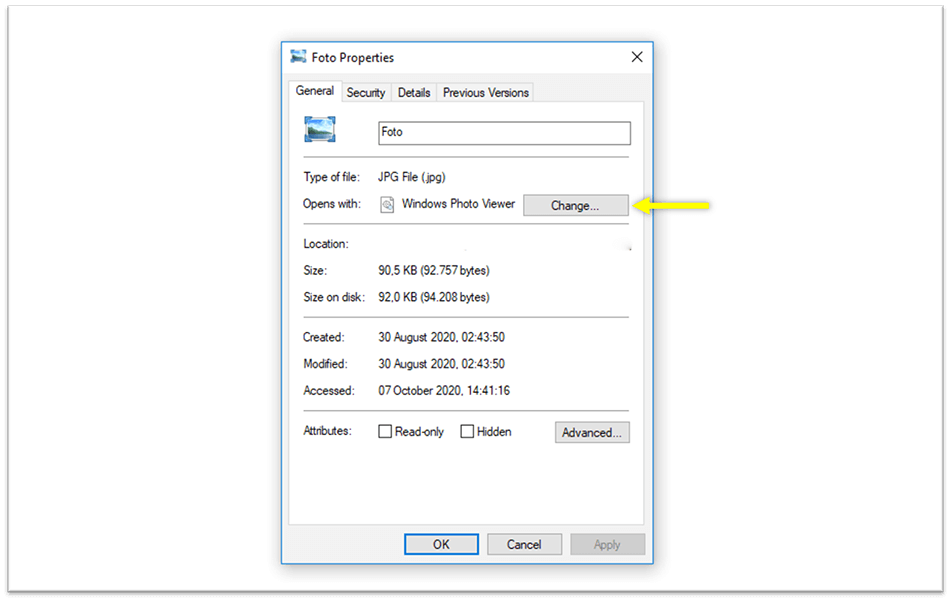
- Then on the General tab, select the Change button.
- Then select the Windows Photo Viewer application.
- Then click OK
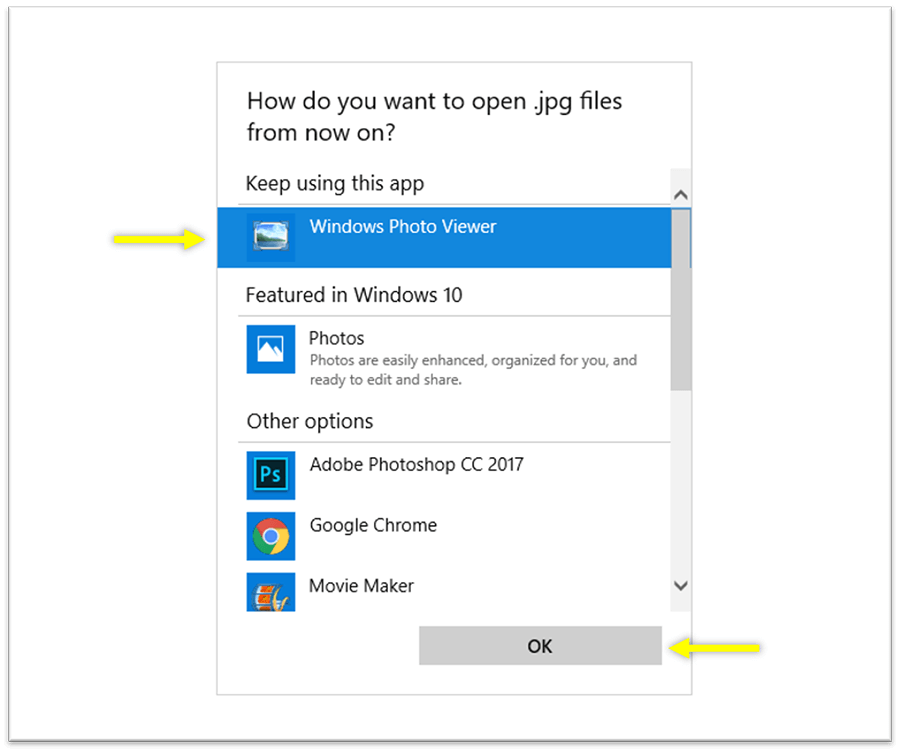
- So now your photos can be displayed using Windows Photo Viewer.
Read more:
- How to Resolve Error Code 0x0003 (2020)
- 7 Easy Ways to Enable WiFi on Laptop Windows
- How to Install and Use Apple Notes on Windows 10
Conclusion:
The problem is not the presence of the Windows Photo Viewer application on Windows 10 occurs only if you do the installation again or encounter an error during installation.
Because basically, this application is the default application on Windows 7 and 8. If you want to upgrade to Windows, there are certain default applications that will change.
What is Windows Photo Viewer Windows 10?
Windows Photo Viewer is an application for viewing photos on Windows.
Why isn’t Windows Photo Viewer Windows 10?
Because it has been removed, but of course, you can still return it if you want.
Don’t forget to bookmark and always visit every day Technadvice.com because here you can find the latest technology information such as How-to Guide Tips and Tricks Blogging Digital Marketing Windows Android Root Social Media games, ETC. Best of luck.
The post 11 Ways To Restore Windows Photo Viewer Windows 10 PC 2024 appeared first on Technadvice.
Comments
Post a Comment