How to Create a Table of Contents in Word – In this post, we will explain how to create a table of contents automatically and will also explain how to create pages in Microsoft Office ( Ms.Word ).

How to Create a Table of Contents in Word 2023
In writing, a table of contents is a very mandatory component. The reason is that writers are required to provide a table of contents in a written work.
Read more:
- 5 Ways To Activate Microsoft Office 2013 Permanently Offline
- How to Activate Microsoft Office 2010 Permanently Offline
- How to Activate Microsoft Office 2019 Permanently Offline
For example in writing a book, the table of contents is very important in writing scientific papers such as theses, papers, theses, dissertations, and many more.
What are the benefits of a table of contents in an essay?
The first is initial information about what will be discussed in a book or scientific paper.
The term table of contents is the subject of discussion, in some books have written a synopsis at the back of the book that tells the reader about the material topics or discussions in a book.
The table of contents also contains information on discussion topics contained in chapters or sub-chapters on each page.
In addition, the table of contents can also make it easier for readers to find information in a book or written work they are looking for.
The contents of the book are applied based on chapters and subchapters on each page. The existence of flat content can make it easier for people who are looking for material on the book page because it can be seen from the table of contents.
The discussion below will explain also how to create pages in the word correctly. Check out the explanation below!
How to Create an Automated Table of Contents and Pages in Word
#1. Create an Automatic Table of contents
- Open the Microsoft Word that you use, then create a file in Microsoft Word. If you have selected the References menu, then select the Table of Contents menu. Choose according to your needs. The explanation here selects the Automatic Table 1 type.
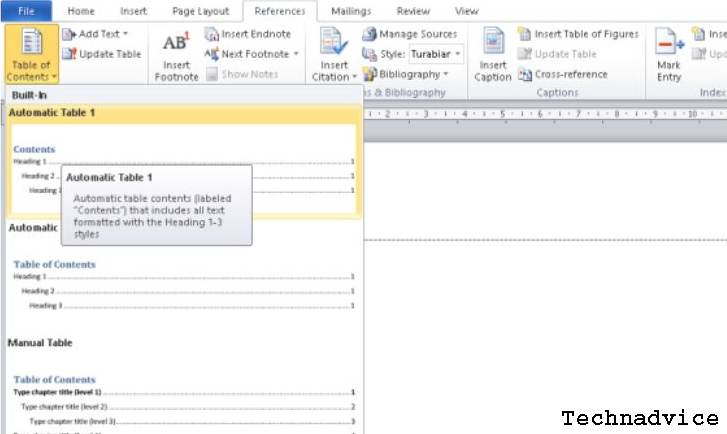
Then on your word screen will appear as shown below.

It can be seen in the picture above that there is a Table of Contents description or the table of contents is not found. Because there are several steps that must be made first.
- Next, you must first create any chapters or sub-chapters that you will create in the table of contents. For example, as follows:> Preface
>Prologue
> Introduction
> Introduction to Ms. Word
> Benefits of using Ms. Word
> How to use Ms. Word
> About the Author
> IndexThe chapter above is made with different pages.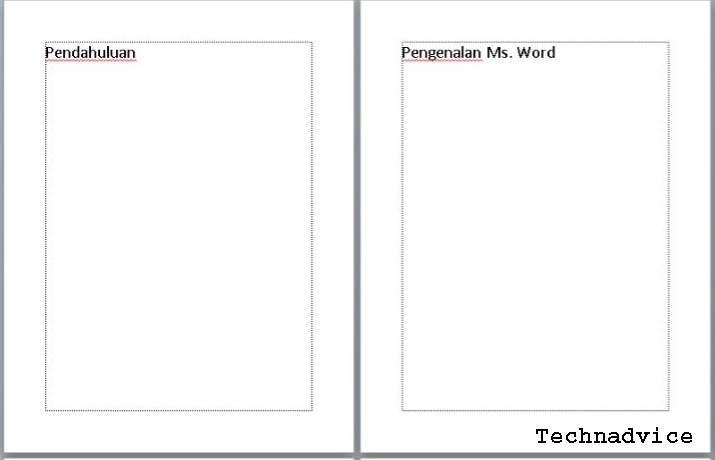
- Then set the style of the chapter title writing to be Heading 1 or Heading 2. The trick is to block writing and then on the Styles menu in Home select Heading 1 or Heading 2 and do it on all pages.

- Then if every page has been completed, the next step is to create a page or Page Numbers. The step is that you select the Insert menu, then in the Header and Footer column click Page Number.
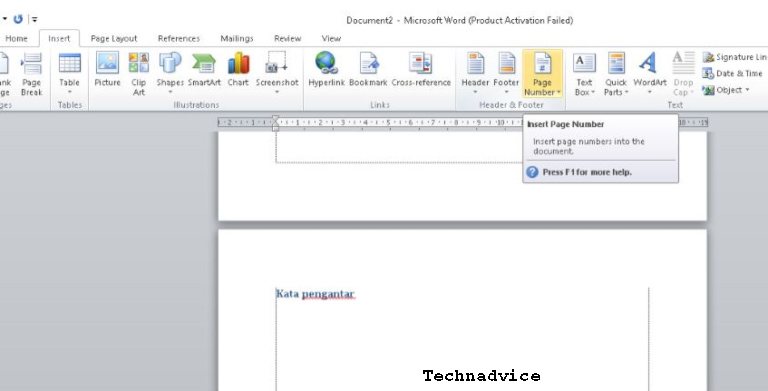
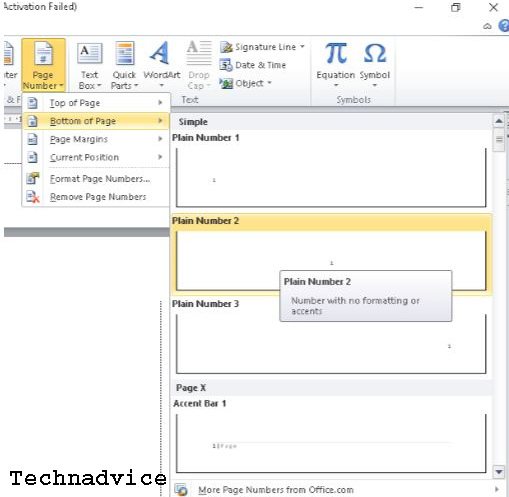
If you have selected Page Number, you will see that there are several page number options. Here is an example of using page numbers in the bottom center, see the image below.
- Then the next step is to open the first page where the table of contents will be created, then click Update Table.

If you have selected the update table it will appear writing on each chapter of your page.
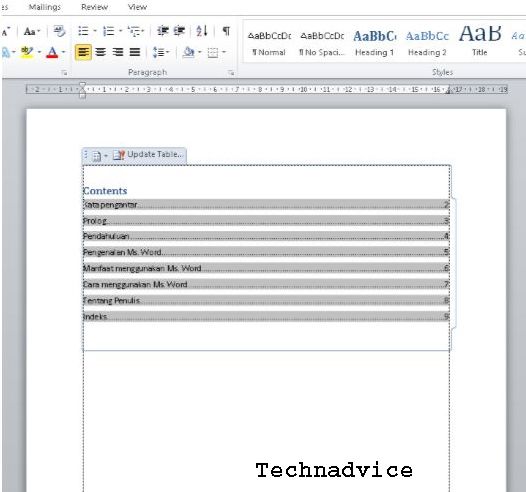
Note: The following explains how to create an automatic table of contents for page chapters, if you make changes to each page, change titles or add pages, you only need to click on the update table as in the fourth step above.
The changes you make will appear as shown above. Select Update Page Numbers Only if the table of contents page has not changed, on the title name then select Update Entire Table if there is a change in the title name or the addition of a title on the page.
#2. Creating Word Pages
Creating a Page Number
- Open Microsoft Word, select Insert in the header & footer section, then click page number.
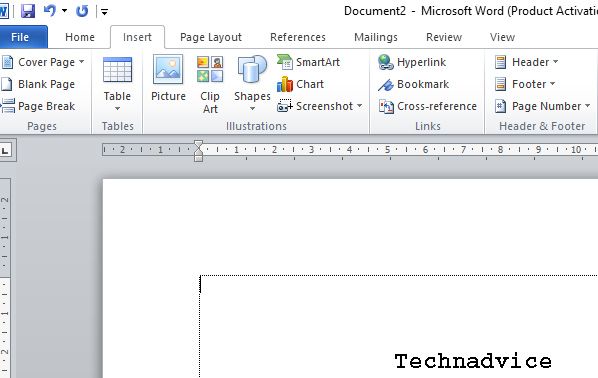
- Then select the page number location:
- Top of Page, the placement of the page number at the top or header.
- Bottom of the Page, placement of page numbers at the bottom or footer.
- Page Margins, the placement of the page number of the page margin.
- Current Position, the placement of the page number at the cursor position.
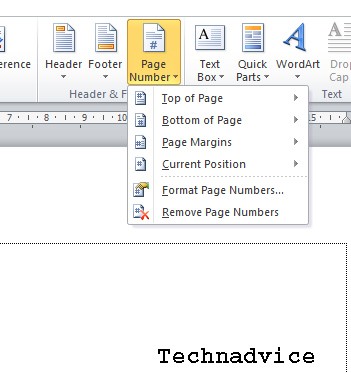
- Then click the page number according to your wishes
- If you have closed the header or footer by double-clicking on the inside of the document you can click the Close Header & Footer button.
Change Page Number
The example here will change the page number format from 1,2,3 to I, ii, iii.
- First Double- click on the header or footer on the page number to display the Header and footer Tools.
- Then on the Design tab, Header & Footer, select and click Page Number, then click Format Page Numbers in the selection.
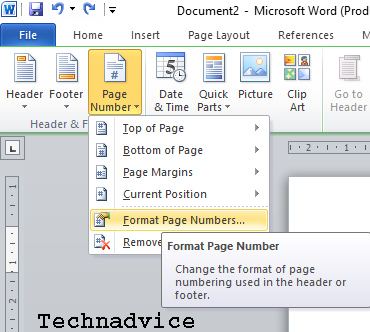
- In the Page Number Format box view, in Number format, click the arrow section and select the one you want.
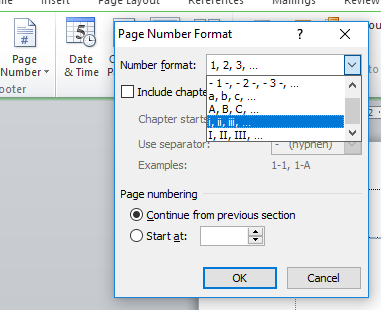
- Then click OK.
Creating Word Page Margins Size
- Open the Microsoft Word that you are using
- Then on the top menu of the word page select page layout.
- If so, there are many choices, just click on the very bottom ” Custom Margins “.
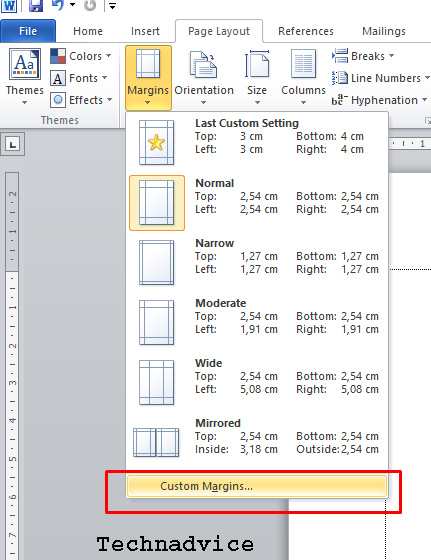
- If you have clicked on the customs margins section, then you will be shown a setup page.
- In the page setup section, set the margins to op, left, bottom, right, gutter, and gutter position according to your needs.
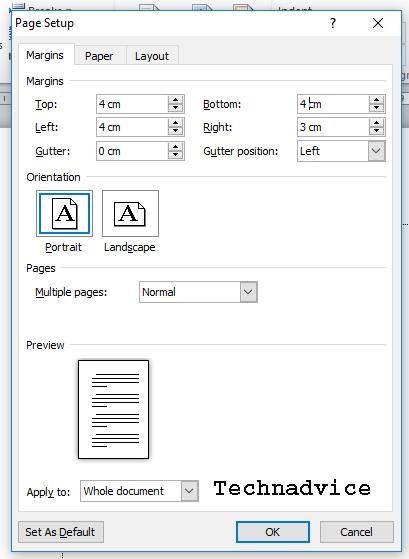
- Then click paper in the page setup section, to set the paper you are using.
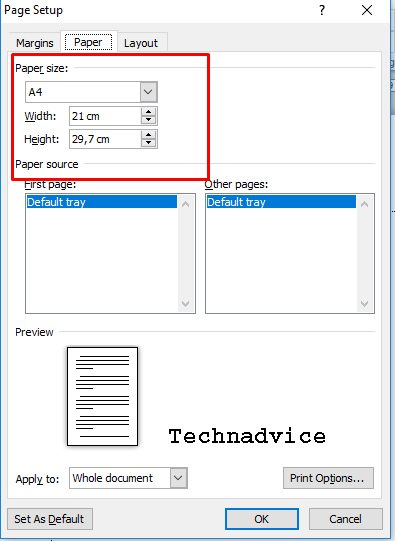
- Then click OK.
Conclusion:
That’s the discussion on how to automatically create a table of contents and pages in Word, hopefully, it’s useful.
Don’t forget to bookmark and always visit every day Technadvice.com because here you can find the latest technology information such as How-to Guide Tips and Tricks Blogging Digital Marketing Windows Android Root Social Media games, ETC. Best of luck.
The post How to Create a Table of Contents in Word 2023 appeared first on Technadvice.
Comments
Post a Comment