4 Best Ways To Enable Aero in Windows 7 – Although it has been released for a long time, Windows 7 is still widely used by some people.
How To Enable Aero in Windows 7 PC Laptop 2023
The reasons are various. Besides being considered lighter, in Windows 7 there is also an Aero feature that makes the system look modern, not inferior to the latest Windows now.
Read more:
- 15 Best Free Audio Editors Software for Windows and Mac
- 6 Ways to fix the error “This copy of Windows is not Genuine”
- How To Change Laptop Wallpaper Windows 10,8,7 PC
- 3 Quick Ways to Remove Old Windows on PC Laptop
Talking about Windows Aero, activating it is not difficult. For those who want to know more about this feature, you can check the following discussion.
What is Aero in Windows 7?
Aero is a Windows feature, which is useful for making the UI ( User Interface ) more beautiful.
One of the functions of this feature is to be able to activate the transparency glass, which makes the dialog box look transparent.
In addition to making the appearance more beautiful, Aero can also make Windows 7 look more modern. This feature itself can be used in Windows 7 Home Premium and above.
How to Enable Aero in Windows 7
If you want to use the Aero feature, it is recommended that you first check the specifications of the PC / laptop you are using. So that the system remains optimal when running.
The following are the minimum specifications for the Aero feature:
| Component | Required Specifications |
| Processor | 1 GHz 32-bit or 64-bit |
| RAM | 1GB |
| VGA | 128 MB |
If it’s okay, here’s how to activate the Aero feature in Windows 7:
#1. Open the Personalize Menu
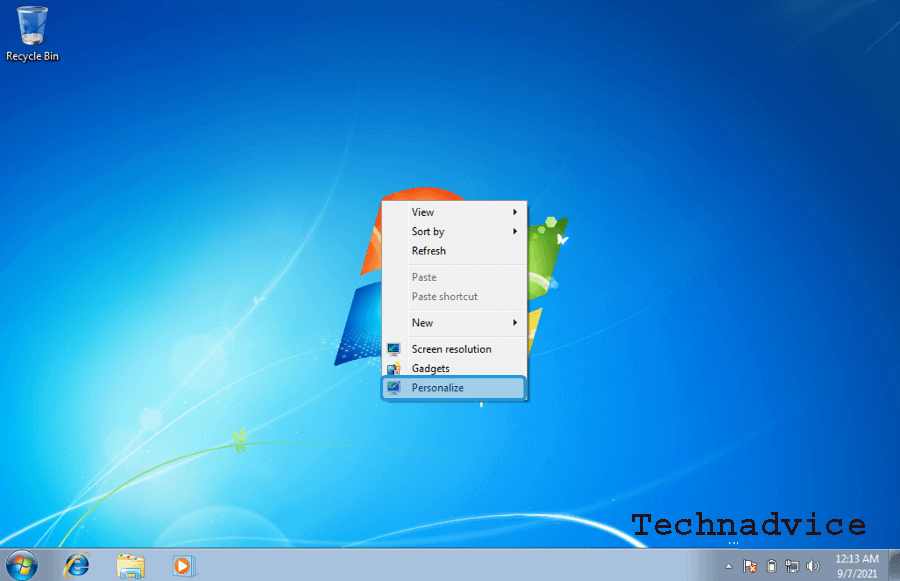
In the first step, please right-click on the desktop initial view. Then select Personalize (menu to change the appearance of the system).
#2. Click Windows Color
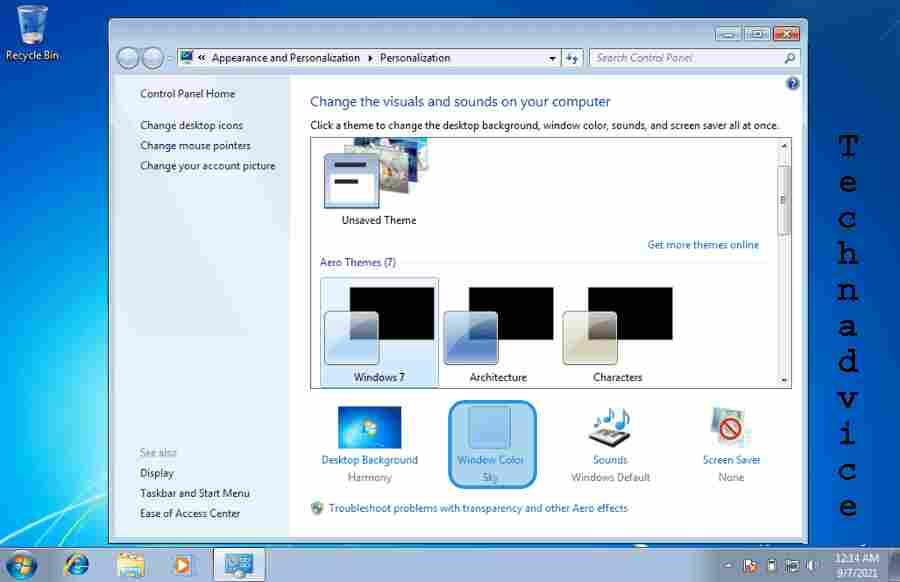
If you have, a dialog box will appear on the desktop display. Since we want to enable Aero, please click Window Color.
#3. Enable Transparency
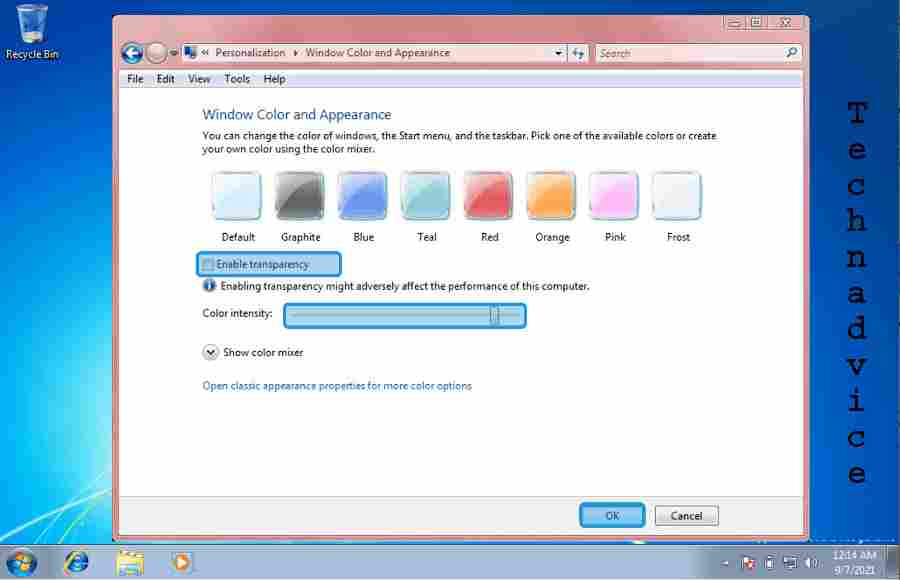
Then you can choose the window color ( Window Color ) as you wish. For example, here I chose the color red.
Continue to check Enable Transparency and set the Color Intensity to your liking. If so, click the OK button.
How to Fix Windows 7 Aero Can’t Activate
Sometimes Aero Windows 7 can also error we can’t activate. Like transparency, the feature does not appear on the display. Here’s how to fix it:
#1. Using Aero Enabler
The first way is you can use the Aero Enabler application. This application can be a substitute when the menu to activate Aero on the system does not work.
Here are the steps to use it:
1. Please download the Aero Enabler application first.
2. Then install Aero Enabler as usual.
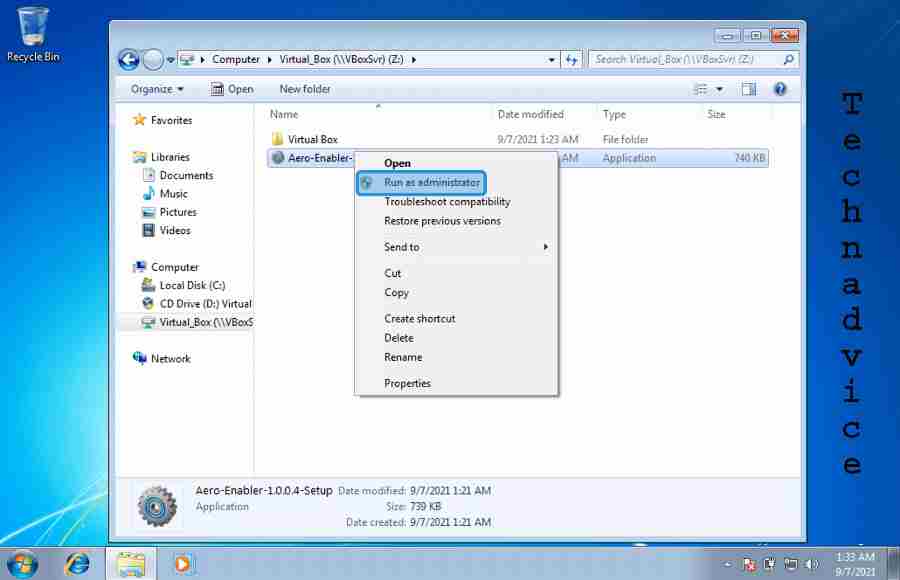
3. If so, right-click Aero Enabler and select Run as Administrator.
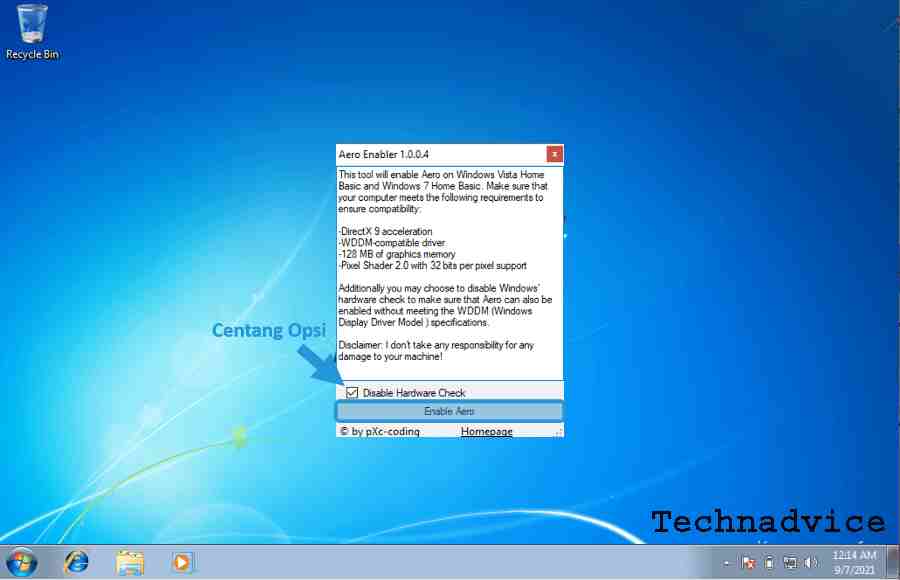
4. Continue to check Disable Hardware Check.
5. Click the Enable Aero button.
6. Done.
#2. Make sure Windows is Activated
If you have used Aero Enabler but the Aero feature is still not active, you should first make sure whether the Windows you are using has been activated or not.
Because if Windows has not been activated, the system features will be limited. Including Aero.
Here’s how to check it:
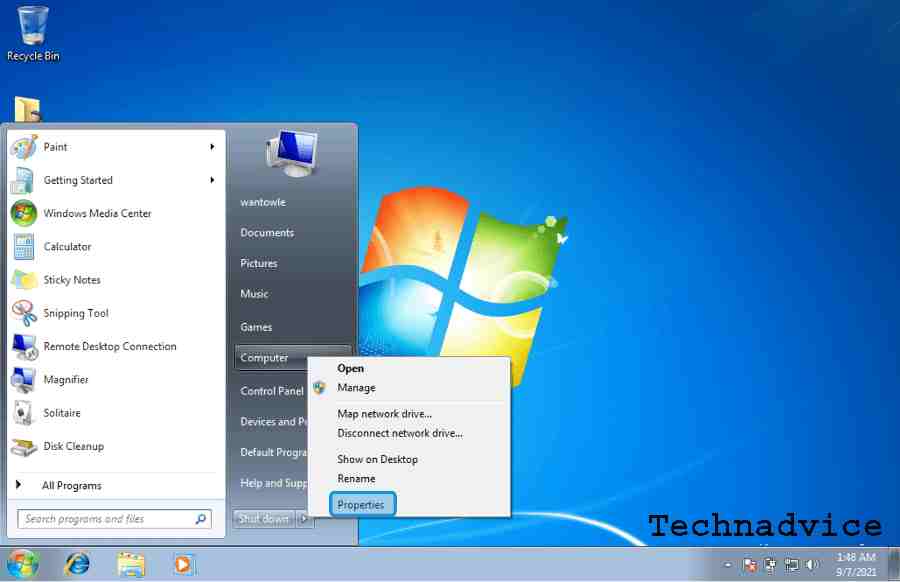
1. Click Start Windows.
2. Then right-click on the Computer menu and select Properties.
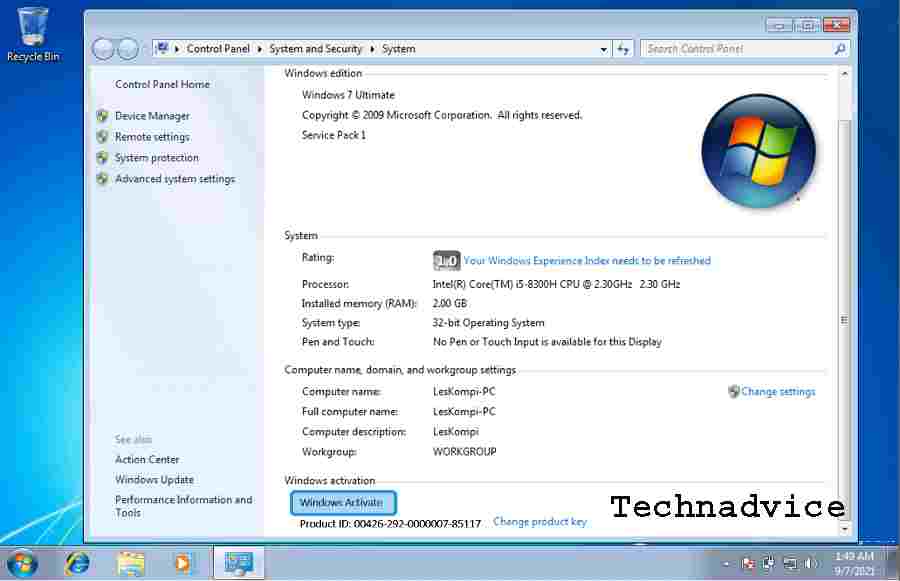
3. Go to the bottom and check the Windows Activate column.
4. Done.
#3. Make sure you are using the appropriate version of Windows 7
As mentioned earlier, to activate the Aero feature, the minimum Windows version used is Home Premium.
If you are using Windows 7 Starter or Home Basic, the Aero feature will not work. How to check it like this:
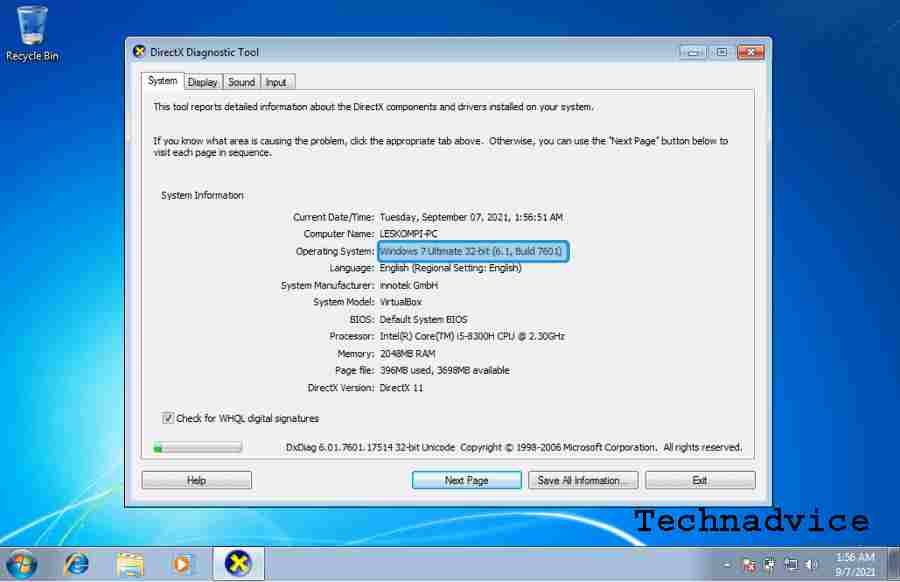
1. Press Windows key + R to activate Windows Run.
2. Then type dxdiag and press Enter.

3. Finally, you can check the version of Windows 7 in the Operating System column.
4. Done.
#4. Run Troubleshoot
The last way, you can use the troubleshooting feature. This feature serves to check errors on the Windows 7 system automatically, including the Aero feature.
Here’s how to run it:
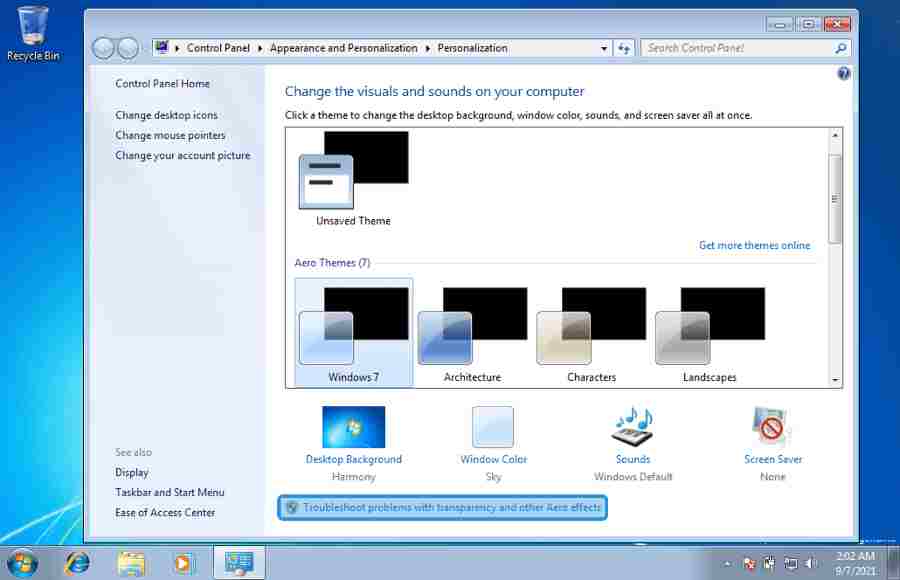
1. Right-click on the desktop view and select the Personalize menu.
2. Next, click the Troubleshoot problems with transparency and other Aero effects menu.
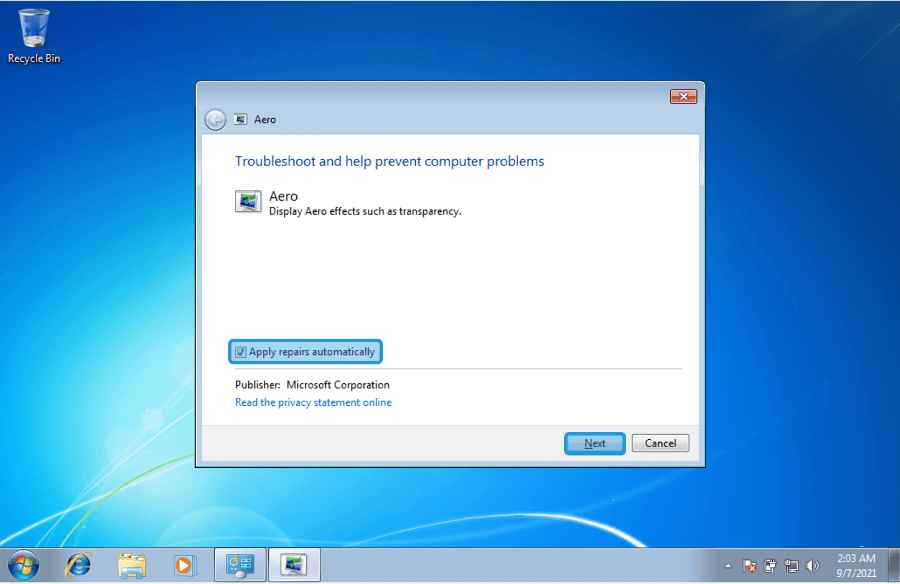
3. Here the Aero Troubleshoot dialog box will appear, please check Apply Repairs Automatically and click Next.
4. Wait for the Detecting Problems Aero process.
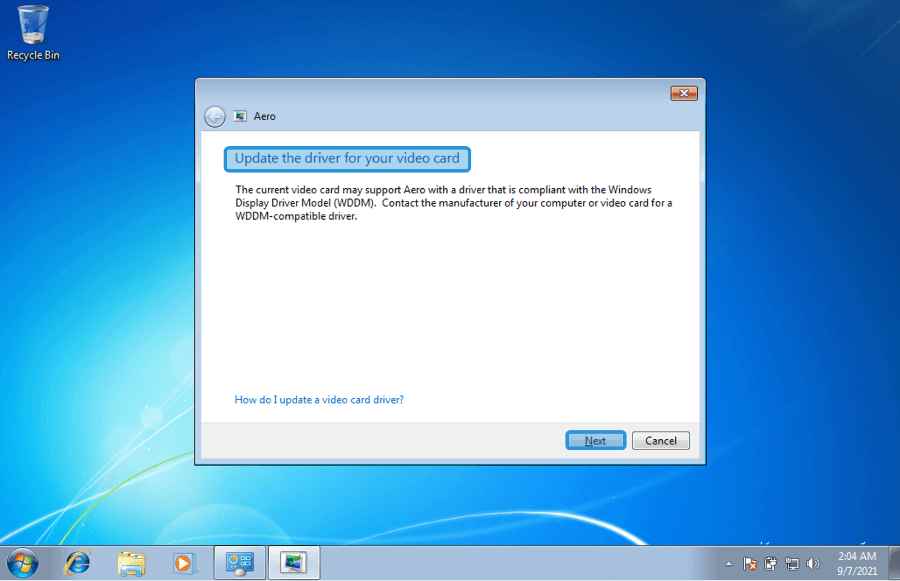
5. If there is a problem, the system will display an information notification. For example here my VGA is not supported.
6. You can click Next again to detect the next problem if any.
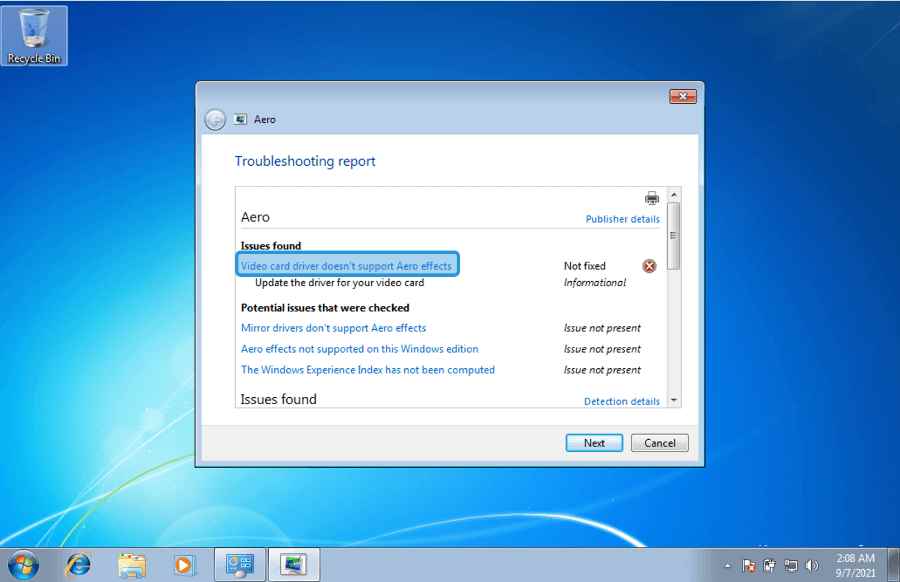
7. After the problem detection process is complete, click View Detailed Information.
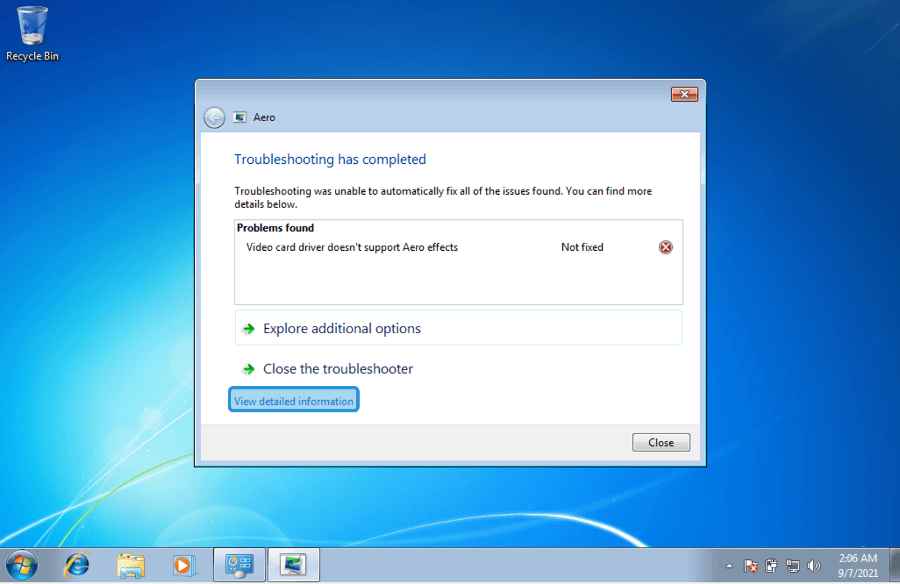
8. Later all the problems that cause Aero to be not active will be displayed. You can fix it according to the problem.
Conclusion:
So, friends, This is the explanation of the 4 best ways to enable aero in windows 7, Windows Aero feature for Windows 7 users this feature can be activated. Especially if you want the system to look modern and beautiful.
Of course, note that the specifications of the PC or laptop that are used are appropriate so that they are not heavy. If you have any questions, post them in the comments.
Don’t forget to bookmark and always visit every day Technadvice.com because here you can find the latest technology information such as How-to Guide Tips and Tricks Blogging Digital Marketing Windows Android Root Social Media games, ETC. Best of luck.
The post 4 Best Ways To Enable Aero in Windows 7 [2023] appeared first on Technadvice.
Comments
Post a Comment