how to Remove IDM Completely From Windows 10 PC – Who doesn’t know IDM? For those of you who like downloading, you must be familiar with this application, please. Yup, IDM is known for the advantages it offers, such as:
How to Remove or Uninstall IDM Completely From Windows 10 PC Laptop 2023
- Speed up file downloads.
- Make the download process stable.
- Prevent file corruption.
- And others.
IDM itself has been released for a long time, and the number of users cannot be counted anymore at this time.
Read more:
- Best Tricks To Fix IDM Fake Serial Number Error
- How To Fixed IDM Errors Not Working on Google Chrome
- How To Integrate IDM With Mozilla Firefox
- 3 Ways to activate IDM on Chrome
How to use IDM is also very easy. Starting from the install process, until when we want to delete it.
Departing from this, here I want to discuss a little how to properly uninstall IDM until it is clean. Because, apparently there are still many people who don’t know it, you know.
Let us discuss: how to Remove IDM Completely From Windows 10.
How to Uninstall Internet Download Manager (IDM) on Windows 10 PC
In short, how to delete IDM from the computer, the steps are as follows:
- Open the Control Panel.
- Enter the Program and Features menu.
- Look for IDM > Right click> Then Uninstall.
- Select the Default or Full option.
- Wait for the uninstall process to complete.
For a more complete guide, please continue reading the following discussion: on how to Remove IDM Completely From Windows 10.
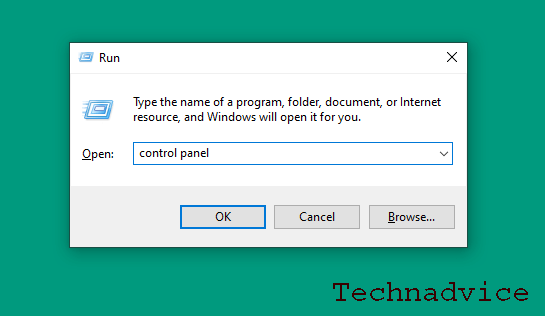
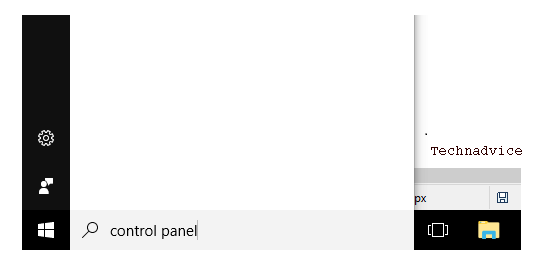
- For the first step, please open the Control Panel first. You can via the search column, type ” control panel “. You can also click the Windows key + R, then type ” control panel ” and click OK.
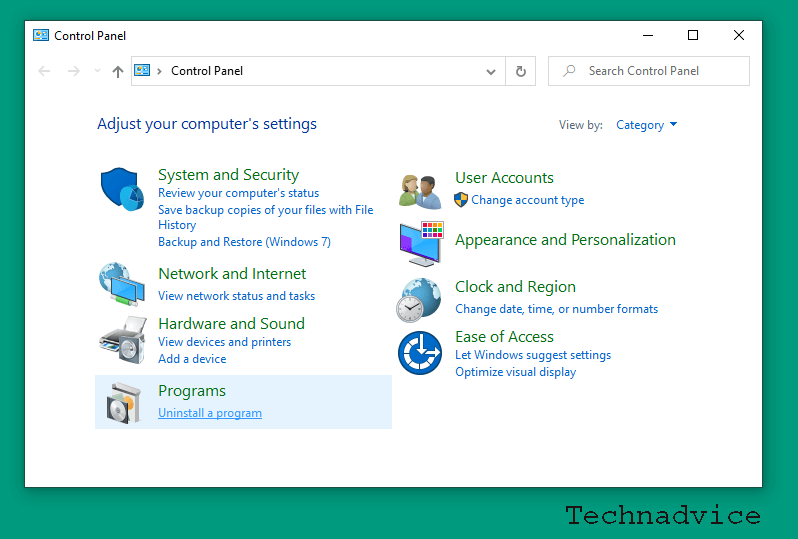
- Now, if you are already on the Control Panel page, please click the Uninstall a Program button.
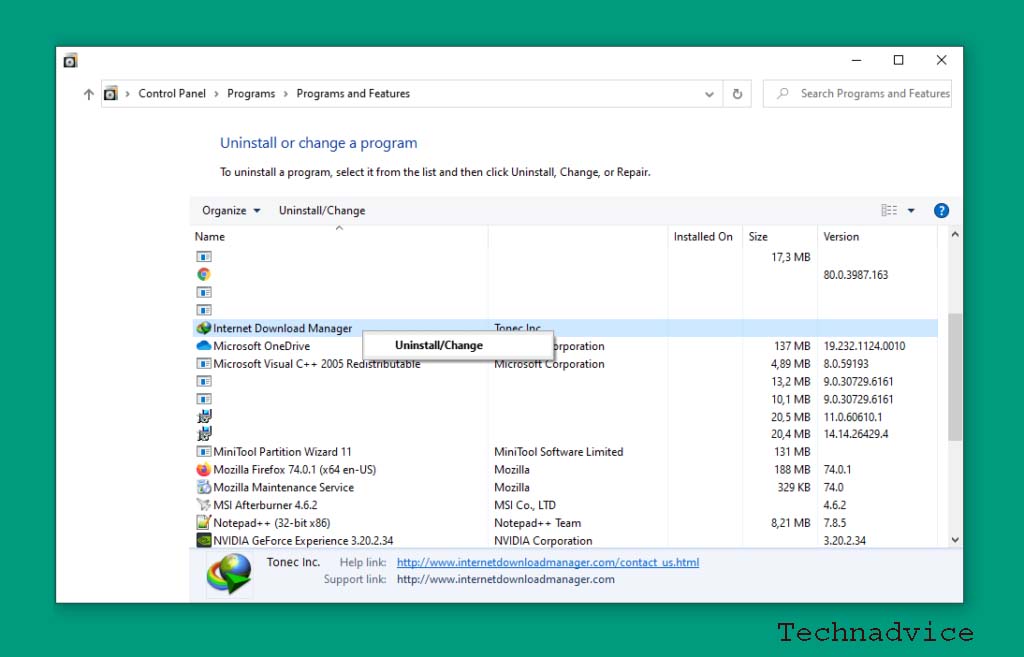
- Now, we are on the Program and Features page. Here, please look for the Internet Download Manager application. If you have found it, right-click the application, then please click Uninstall.
- An uninstall window will appear. There are two options here, namely Full and Default. For this option, I select the Full option.
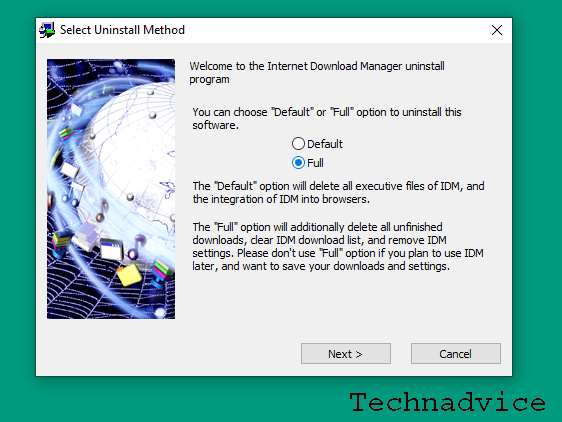
What’s the difference between the Default option and the Full option? Try checking in the following table:
| Full | Default |
| Deletes all IDM data contained in Windows. | Delete the IDM application only, not with data. |
- Wait for the uninstall process for a few moments. Usually fast, really. Less than 1 minute is also done.
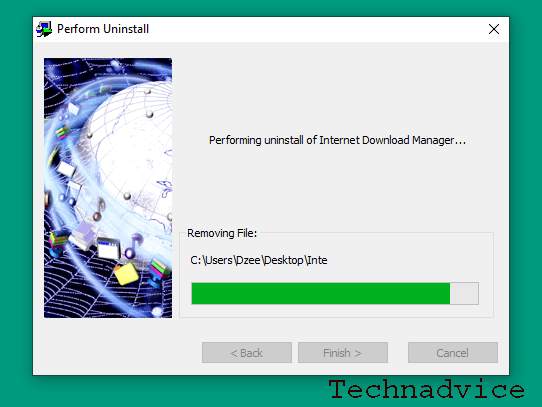
- If so, a notification will appear. Click OK, then the computer will restart.

Now, after restarting, IDM has been deleted from your computer.
Yes! It’s just that easy. Really easy right?
But wait, it’s not over here yet, you know. In order to be completely clean, we must also delete the registry.
How to Delete the Registry from IDM
After removing IDM, the registry data will still be stored on the system. We must also remove this registry data. The method is as follows:
First of all, please click the Windows key + R on the keyboard. Type ” Regedit “, then click OK. If a notification appears, just click OK again.
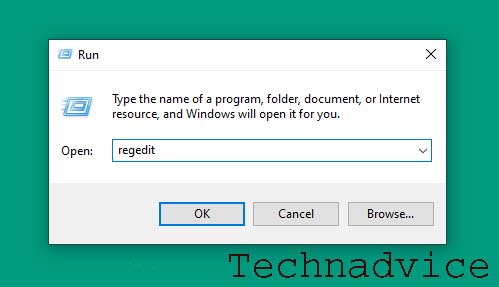
Next, on the Regedit page, please enter the location of these two folders:
- HKEY_CURRENT_USER> SOFTWARE> Internet Download Manager.
- HKEY_LOCAL_MACHINE> SOFTWARE> Internet Download Manager.
Please delete the Internet Download Manager folder to remove the registry. If so, restart the computer.
An example can be checked in the following image:
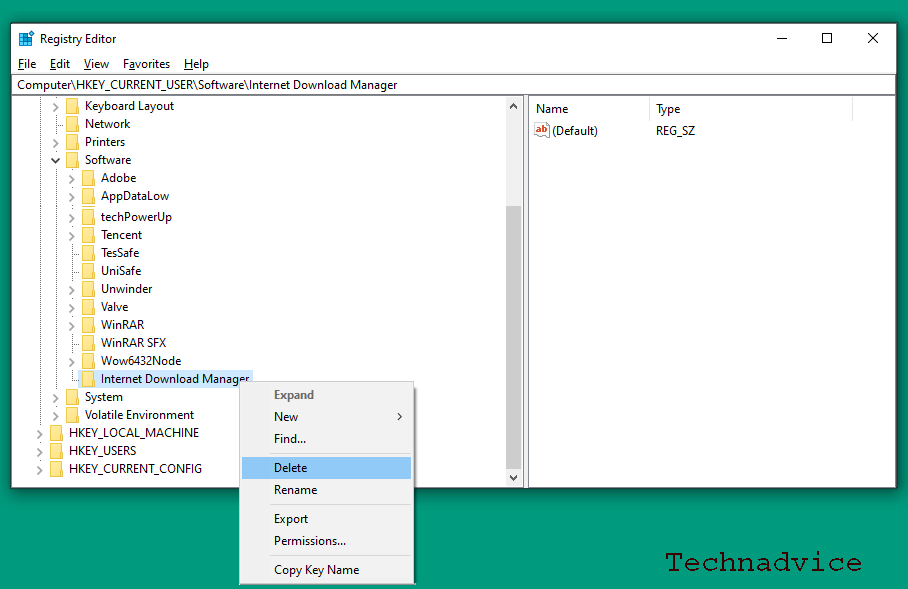
This is just the first step, huh. In the second step to clean the IDM registry, we use the CCleaner application. The method is like this:
- Please install the CCleaner application first. Free, really.
- If so, continue to open the application. Then please select the Registry menu.
- On the Registry menu, please click Scan, then wait a few moments for the process to finish.
- If so, click the Fix Selected Issues button to delete all existing registries.
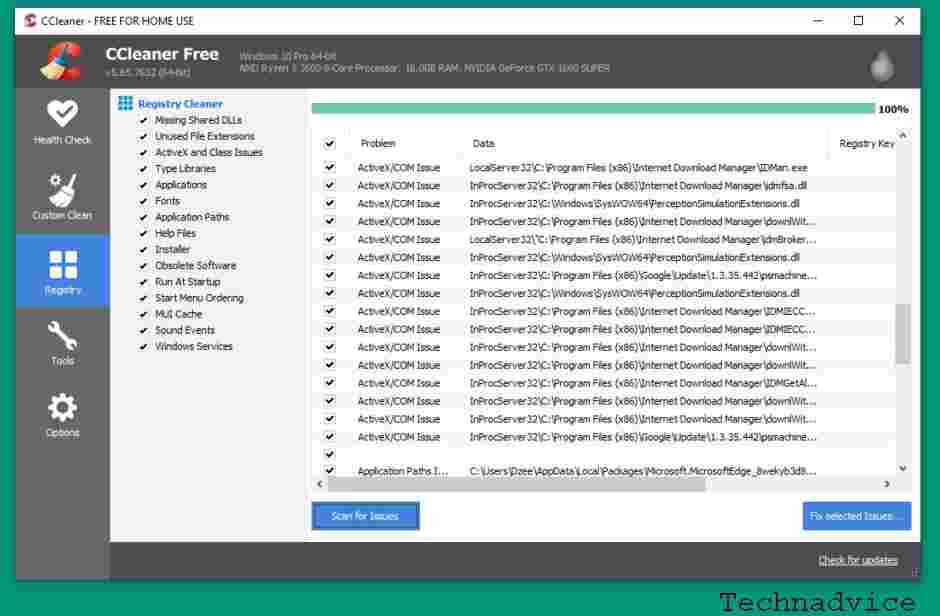
CCleaner is intended to delete other IDM registry data that is still left behind. The goal is to maximize manual registry removal as was done in Regedit earlier.
Guaranteed to be cleaner, anyway.
Other Ways If You Want More Simple
The steps I described above are all manual.
Well, if you want it to be simpler, you can actually do it. You can use additional applications. For example:
- Revo Uninstaller.
- IObit Uninstaller.
- Wise Program Uninstaller.
As well as similar applications.
These applications have a feature to remove programs installed on the system, as well as delete the registry at the same time.
You can try it if you want. The method is simple, really. More or less like this:
- Install the uninstaller application. Can be any, as needed.
- Open the application.
- Enter the program removal menu.
- Look for the IDM application, then select the Uninstall option.
- Wait for the process to complete.
If so, restart the system as usual.
2. How to Uninstall IDM Until Clean
In general, there are 2 ways to delete IDM that you can do. Here is a description of the three ways un install l IDM them.
#1. Delete IDM Through Control Panel
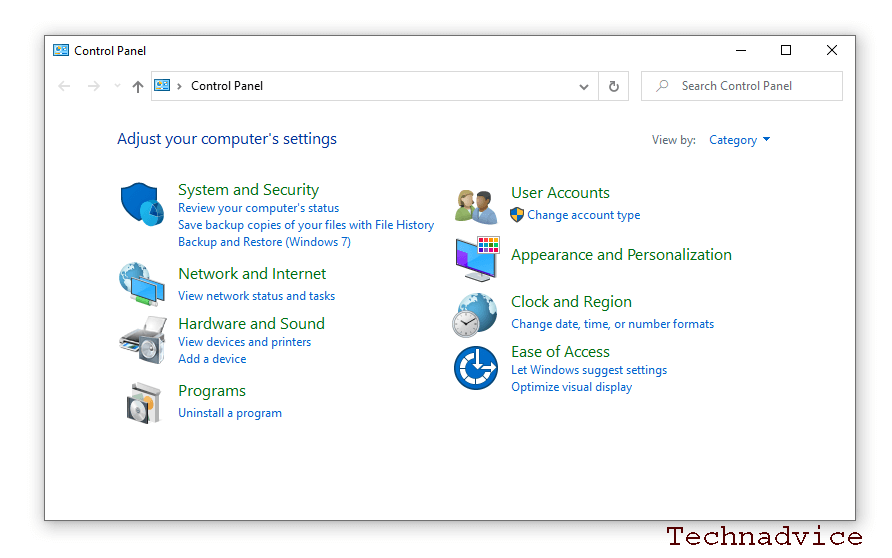
The first way you can use to delete IDM is to uninstall it through the Control Panel.
This method is quite easy because you only need a few steps to delete this application to its roots on a PC device.
- The first step is to open the Control Panel via Windows search
- To remove the software, you can click the Uninstall a program option
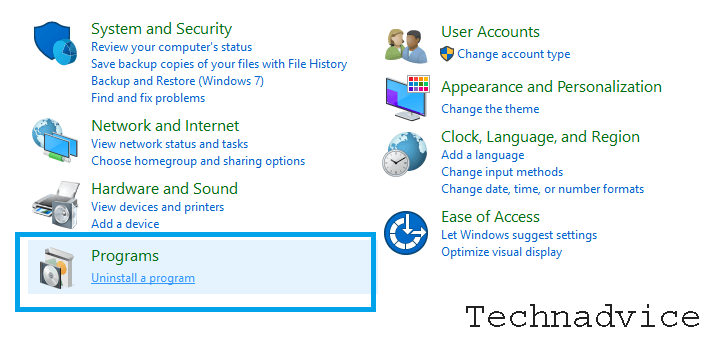
- On the Programs and Features page, look for the Internet Download Manager software
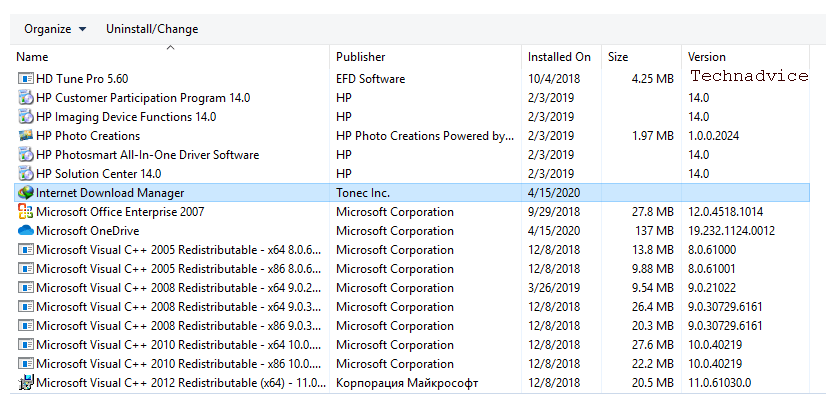
- Right-click on the “ Internet Download Manager ” section and select the option “ Uninstall / Change. “
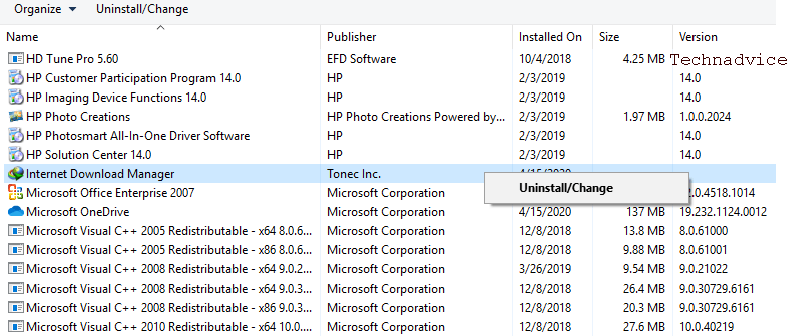
- The next step follows the instructions that will be directed by IDM to make the process of uninstalling the l program.
- Later you will be given the option to select ” Default ” or ” Full ” to uninstall l the program.
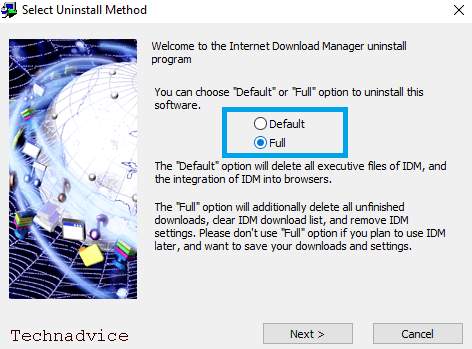
It is recommended that you prefer the “Full” option to delete all data stored in the browser system.
- After selecting ” Next “, wait a moment to complete the process of uninstalling l IDM.
- After the IDM program is successfully removed, a notification will appear that you need to restart the computer you are using.
- Click ” OK ” then wait for the computer to restart successfully.
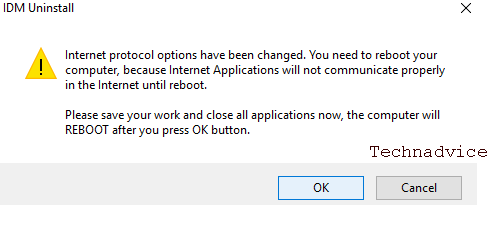
After all processes have been completed, IDM has been successfully erased completely on your computer device.
#2. How to Delete the IDM Registry
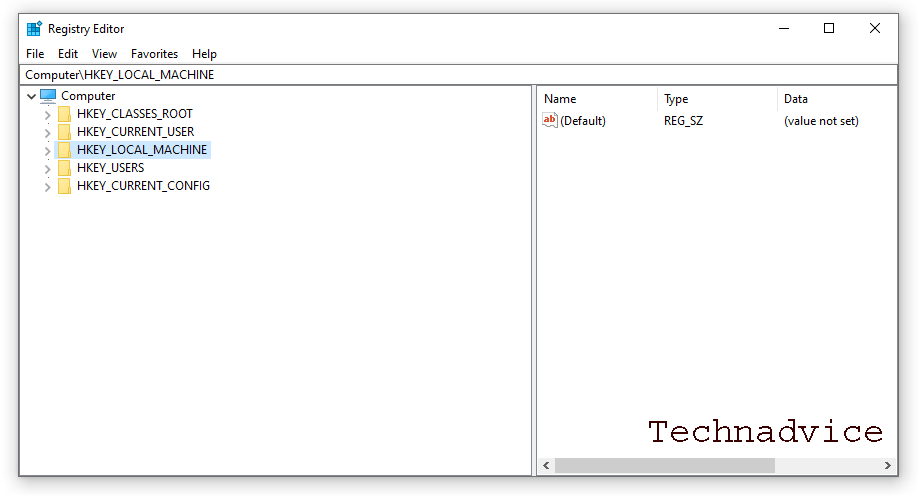
Deleting the IDM registry on the computer or laptop device you use is another important step.
Here are some steps to delete the IDM registry in Windows.
- First, open the Windows Run menu by pressing the Windows key + R on the keyboard.
- After the Windows Run window appears, you can write “regedit.exe” in the available column.
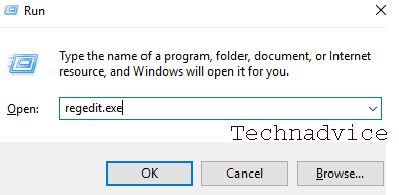
- After that, you can click the ” OK ” button at the bottom of the window and if the UAC Window appears, you can click ” Yes ” to enter the Registry Editor page.
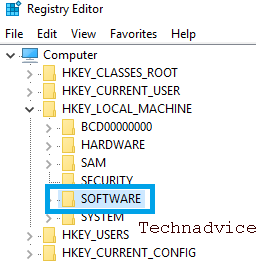
- After successfully entering the Registry Editor page, enter the HKEY_CURRENT_USER and HKEY_LOCAL_MACHINE folders then select ” SOFTWARE ” in the folder.
- Look for the ” DownloadManager ” folder then right-click and select the delete option.
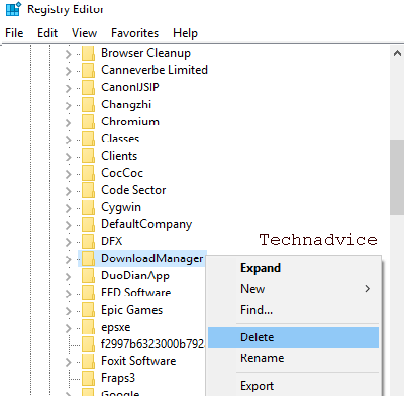
- After success, all IDM files and data that are on your computer device will be deleted until clean.
Read more:
- How to Reduce Brightness in Windows 7/8/10
- 10+ Best Free Data Recovery Software for Windows 10
- 4 Ways to find your Computer’s System Specification
Conclusion:
So, friends, Those are the steps to how to Remove IDM Completely From Windows 10 or delete the IDM application from a computer or laptop. For those who want to install it again, just install it as usual. Still can, really.
I have tested the guide here myself and can be applied to all versions of Windows (here I myself use Windows 10).
For those of you who may encounter problems – for example, there is a certain error message – please ask via the comments column below. It’ll help later.
Don’t forget to bookmark and always visit every day Technadvice.com because here you can find the latest technology information such as How-to Guide Tips and Tricks Blogging Digital Marketing Windows Android Root Social Media games, ETC. Best of luck.
The post How to Remove IDM Completely From Windows 10 PC 2023 appeared first on Technadvice.
Comments
Post a Comment